DIY Ladybug garden rocks


DIY Ladybug Garden Rocks
I love do it yourself crafts. I especially love them when their easy and inexpensive. I also love ladybugs in my garden but unfortunately I don’t get to enjoy too may in my area. Recently I visited a friend’s garden and couldn’t help but notice that she had these great colorful ladybugs. I could not have been more thrilled when she informed me that they were DIY and I could make some in less than an hour!
These cute ladybugs are painted with 0.97 cent Folkart Plaid acrylic paint from Wal-Mart (no sealer is needed) making them durable and waterproof. A great easy idea for gardens, indoor plant pots, or as gifts. Just follow these easy steps and start enjoying ladybugs in your garden today!
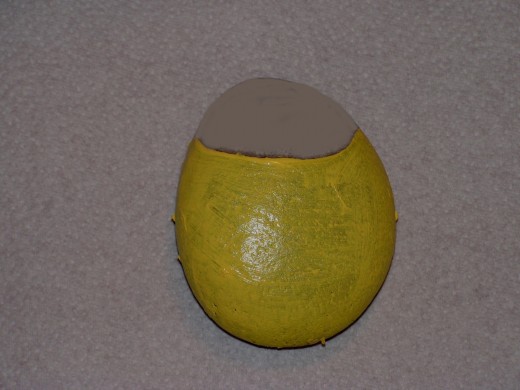
1. Pick a smooth round or oval rock and draw a (half-moon) U on one side. Paint the lower, larger side of the half-moon any chosen, desired bright color.
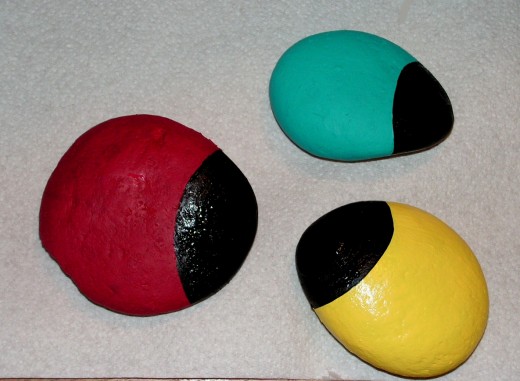
2. Now paint the smaller part of the half-moon solid black.
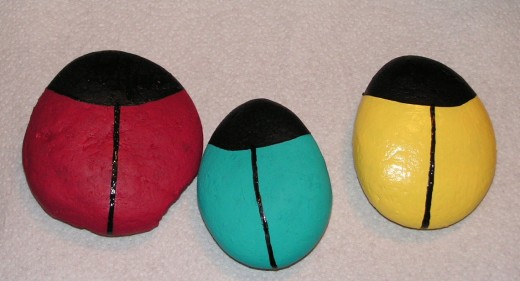
3. Once you have painted the body colors, draw a straight line down the center of the body.
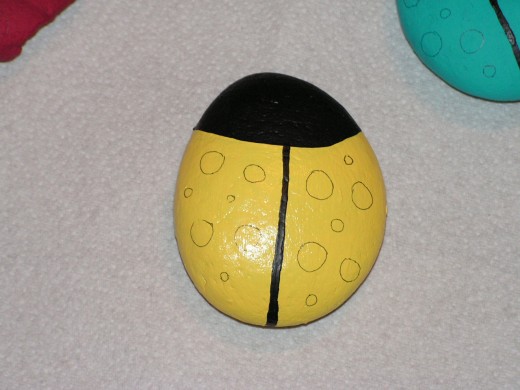
4. using a pencil draw round circles on each side of the line. Some large, some small.
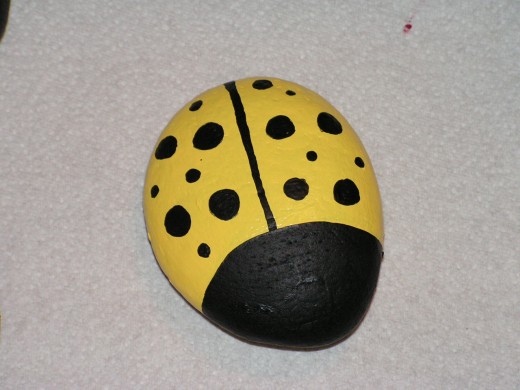
5. Fill in the small and large circles with black paint.

6. Draw two white circles for eyes. (I used a dime as a circle pattern) place a black dot inside the white circle for contrast.
Place your ladybugs in gardens, flower pots or gift them to someone you love. Enjoy!


